|
When I first started with VIPkid, my "classroom" was really just printed posters I found on Pinterest taped to the wall, a desk I had bought years earlier at a thrift store and my laptop. It worked, but I definitely had teacher-envy of the beautiful office spaces and organized props *every other teacher* seemed to have. That launched me into what I describe as the rookie-prop-hoarder stage where EVERYWHERE I saw potential props! I tried to limit my spending, but garage sales, dollar stores, thrift stores and my daughter's bedrooms were all at risk of my new passion. Soon my desk drawers were full, I had shoeboxes piled up on the floor and on my desk, and those tipsy TV trays loaded high. Something dropped, crashed or tipped virtually every day. 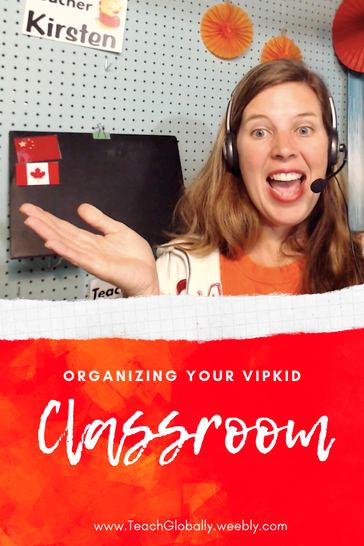 A change in temperature to make the sunroom I taught in unbearably hot, which prompted the need to make a new classroom and finally get organized. We cleared out a corner in our unfinished basement and I had to decide what I wanted to keep and what had just become clutter. In the end, I only kept 3 shoeboxes of physical props and a handful of 2D props that I keep within arms reach. Now the only prep I do is to take a look through the lesson to fill in any knowledge gaps I might have. I also rely heavily on google slides to fill any gaps I might have in my props. (Don't have them? Join their facebook group for FREE resources.). Now, I love my classroom and when my husband suggested moving back up to the beautiful sunroom now the temperature is cooling off, I refused. I LOVE this classroom! Here's how I've organized myself: It always bugs me when people say "GET THIS FOR $20" but what they mean is "I did it for $20 but since I have hundreds of dollars of stuff lying around I could repurpose and you don't, it will cost you $2000!!!" So while I really did only spend $17, here's a more accurate view of what this kind of set up will cost and where you might find them:
The most important thing for organizing is YOU DO YOU! Some of you have to set up and take down every morning, some of you have nice offices to dedicate to this, and some of you need nearly no props and some love their explosion of stuffed toys. The difference for me wasn't my new classroom, it was narrowing down "my style" and deciding what I wanted in my space. Happy organizing!  Oh, and if you were looking for those punctuation printables on the video, find them here!
0 Comments
Most Loved PropsI have now taught over 750 classes, and that means a couple things:
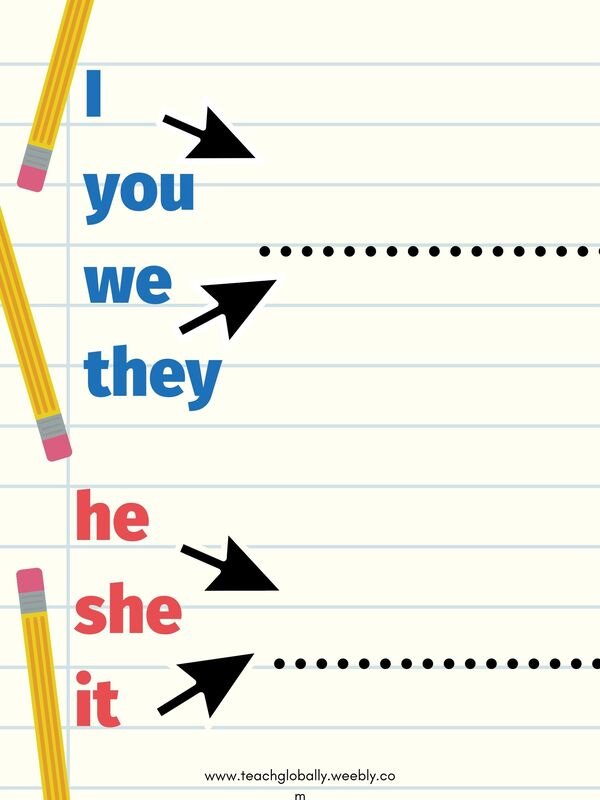
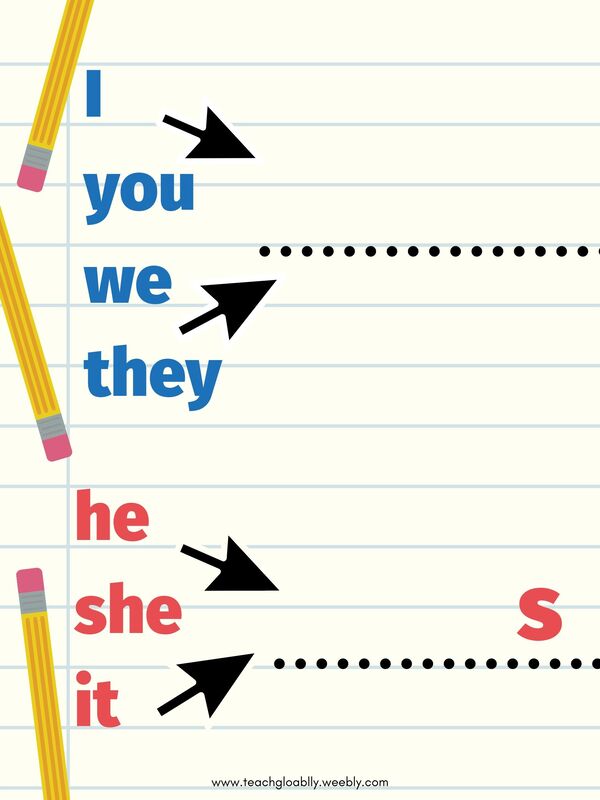
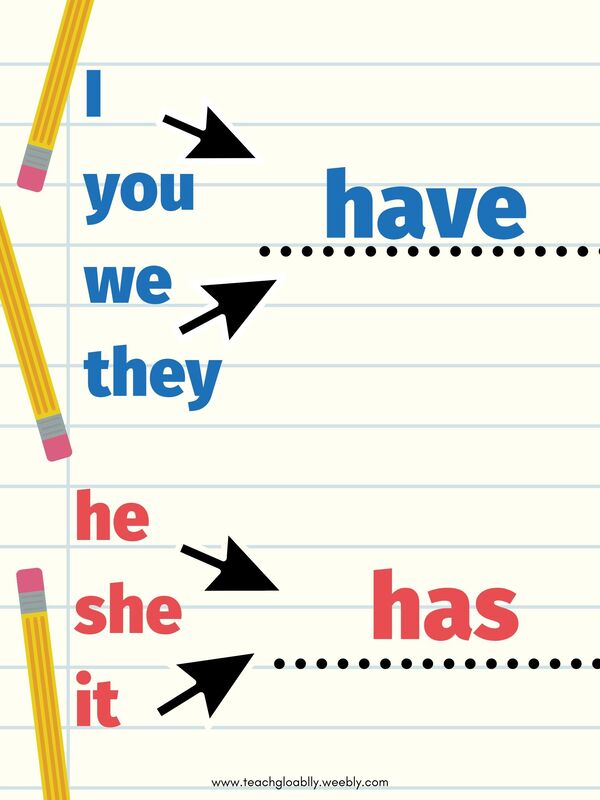
 Punctuation props fall in the third category - I've used them up! To be fair, I get A LOT of mileage out of the question mark, some out of the period and question mark and very little of any other one, but if I'm printing and laminating, I'll make the most of my page! I use the question mark to let kids ask ME a question for some reward systems, or to indicate they need to respond to a question, or in level 3 when they learn how to ASK questions! 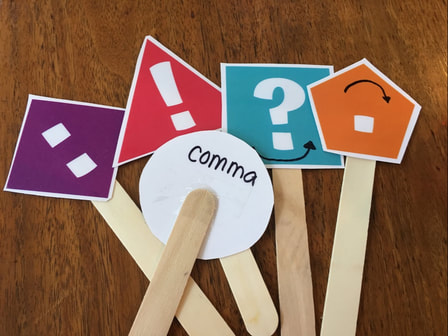 I also have some handwritten marks I've put on my props on these - the NAME of the punctuation mark on the back, and arrows indicating inflection (for PROPER PRONUNCIATION classes, or when you just get tired of a regular's robot voice!)  Help yourself to another freebie! Click on the photo to download. I like to post mine on popsicle sticks for easy storage (I have a clear plastic hanging shoe organizer they go into beside my desk) but they work equally well as flashcards if that's your jam.  VIPkid Facebook groups sometimes have the greatest ideas! If you've been teaching for any length of time, you may already be weary of the constant "I RUN, you RUN, she RUNS..." "We sit, they sit, it SITS..." litanies. I've tried a few props for this, and so far have stuck to writing it out on my whiteboard every time, using a magnetic "S" at the end when needed. It works, but it's bulky. One FB post had a nice little laminated hand-written sign conjugating "have" and "has." Well... I just got a laminator for my birthday so my imagination was sparked! I made a version with the most common: "S" at the end of he/she/it, the original have/has and my favourite, the blank version! If you have a laminator, use that with whiteboard markers, but in my pre-laminator days I would have placed it on a cookie sheet and used magnetic letters for verbs. BOTH work! Just click on the picture to download and ENJOY!
 |
AuthorWrite something about yourself. No need to be fancy, just an overview. Archives
September 2019
Categories |
 RSS Feed
